Home » .NET Development » Create a Welcome Message Prompt Bot with Azure Framework SDK C# .NET {Part 2}
Create a Welcome Message Prompt Bot with Azure Framework SDK C# .NET {Part 2}

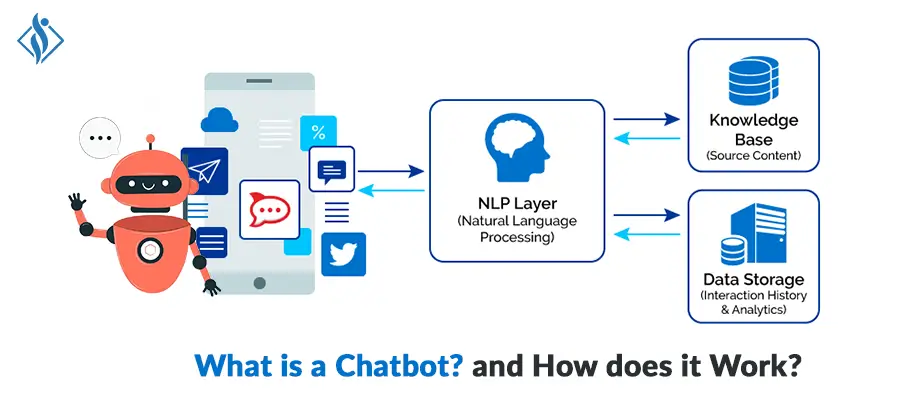
The bot framework enables you to build bots that supports different type of interaction with users. Your bot can also have more guided interactions where it provides the users with choices or actions. The conversation can use simple text strings or more complex rich cards that contain text, images, and action buttons. And, you can add natural language interactions, which let your users interact with your bots in a natural and expressive way.
In this article, Part 2 we will learn how to create a bot using Bot Framework using the C# template, and then testing it with the Bot Framework emulator and how to manage input from user and show welcome message and show card based on user’s input like ‘help’, ‘intro’ etc.
Here is the Glimpse of Full Series of Creating Basic to Fully Functional Customize Chat Bot using Azure Bot Framework SDK.
- Part 1: Basic introduction about Bot Framework and create + deploy simple echo bot.
- Part 2: Welcome user and Prompt simple user interaction bot.
- Part 3: Multi-turn bot using card and action suggestion (take input and return with suggestion).
- Part 4: NLP and Language Understanding Bot.
Prerequisites:
- Visual Studio 2019 or later
- Bot Framework SDK v4 Template for C#
- .NET Core 3.1
- Bot Framework Emulator
- Basic knowledge Asp.net Core and async programming language C#
How to Create a Welcome Message or Prompt Bot? Step by Step Tutorial
Step 1: Download and Install Visual Studio Template using this link .
Step 2: Create a New Project using Echo Bot (.net Core 3.1 Bot Framework v4) Template.

These templates contain all the code that’s necessary to create a bot for the quick start.
Step 3: Start your project now, it will run the default port locally on 3978 looks like this.

Step 4: Download and Install Bot Emulator using this link.
Step 5: Now let’s move towards one more step ahead, create an intro card using Bot. Create a new class in Bot folder “WelcomeUserBot.cs” then declare messages what you want to display to the user.
public class WelcomeUserBot : ActivityHandler
    {
        private const string WelcomeMessage = "Hi, Welcome to Samarpan's bot, you can say 'intro' to see the introduction card";
        private const string InfoMessage = "Hi, this is a info message";
        private const string PatternMessage = "This is a handling 'Hi','Hello','Help','Intro'";
        private BotState _userState;
        public WelcomeUserBot(UserState userState)
        {
            _userState = userState;
        }
Step 6: Add 3 new methods in welcome user class first one will be calling while members added/connected with a bot.
protected override async Task OnMembersAddedAsync(IList<ChannelAccount> membersAdded, ITurnContext<IConversationUpdateActivity> turnContext,
            CancellationToken cancellationToken)
        {
            foreach (var member in membersAdded)
            {
                if (member.Id != turnContext.Activity.Recipient.Id)
                {
                    await turnContext.SendActivityAsync($"Hi there - {member.Name}. {WelcomeMessage}", cancellationToken: cancellationToken);
                    await turnContext.SendActivityAsync(InfoMessage, cancellationToken: cancellationToken);
                    await turnContext.SendActivityAsync(PatternMessage, cancellationToken: cancellationToken);
                }
            }
        }
Second method about adding a prompt card, where the card will show to the user and take input, based on the input card will redirect on the respective link.
private static async Task SendIntroCardAsync(ITurnContext turnContext, CancellationToken cancellationToken)
        {
            var card = new HeroCard();
            card.Title = "Welcome to Bot Framework!";
            card.Text = @"Welcome to Welcome Users bot sample! This Introduction card.";
             card.Images = new List<CardImage>() { new CardImage("https://aka.ms/bf-welcome-card-image") };
            card.Buttons = new List<CardAction>()
            {
                new CardAction(ActionTypes.OpenUrl, "Welcome To Samarpan Infotech", null, "Get an overview", "Get an overview", "https://www.samarpaninfotech.com/"),
                new CardAction(ActionTypes.OpenUrl, "Contact us", null, "Ask a question", "Ask a question", "https://www.samarpaninfotech.com/contact-us/"),
                new CardAction(ActionTypes.OpenUrl, "Learn more", null, "Learn how to deploy", "Learn how to deploy", "https://www.samarpaninfotech.com/blog/"),
            };

            var response = MessageFactory.Attachment(card.ToAttachment());
            await turnContext.SendActivityAsync(response, cancellationToken);
        }
Third & last method for message activities and interaction like this, we can add more condition in switch case from user input.
protected override async Task OnMessageActivityAsync(ITurnContext<IMessageActivity> turnContext, CancellationToken cancellationToken)
        {
            var welcomeUserStateAccessor = _userState.CreateProperty<WelcomeUserState>(nameof(WelcomeUserState));
            var didBotWelcomeUser = await welcomeUserStateAccessor.GetAsync(turnContext, () => new WelcomeUserState());

            if (didBotWelcomeUser.DidBotWelcomeUser == false)
            {
                didBotWelcomeUser.DidBotWelcomeUser = true;
                // the channel should sends the user name in the 'From' object
                var userName = turnContext.Activity.From.Name;
                await turnContext.SendActivityAsync($"You are seeing this message because this was your first message ever to this bot.",
                    cancellationToken: cancellationToken);
               // await turnContext.SendActivityAsync($"It is a good practice to welcome the user and provide personal greeting. For example, welcome {userName}.", cancellationToken: cancellationToken);
            }
            else
            {
                // This example hardcodes specific utterances. You should use LUIS or QnA for more advance language understanding.
                var text = turnContext.Activity.Text.ToLowerInvariant();
                switch (text)
                {
                    case "hello":
                    case "hi":
                        await turnContext.SendActivityAsync($"You said {text}.", cancellationToken: cancellationToken);
                        break;
                    case "intro":
                    case "help":
                        await SendIntroCardAsync(turnContext, cancellationToken);
                        break;
                    default:
                        await turnContext.SendActivityAsync(WelcomeMessage, cancellationToken: cancellationToken);
                        break;
                }
            }
            // Save any state changes.
            await _userState.SaveChangesAsync(turnContext);
        }
Step 7: Before starting the project, we must have to declare a new class in a startup page & configuration for example:
public void ConfigureServices(IServiceCollection services)
        {
            // Echo Bot Service
            //services.AddControllers().AddNewtonsoftJson();

            //// Create the Bot Framework Adapter with error handling enabled.
            //services.AddSingleton<IBotFrameworkHttpAdapter, AdapterWithErrorHandler>();

            //// Create the bot as a transient. In this case the ASP Controller is expecting an IBot.
            //services.AddTransient<IBot, EchoBot>();

            // Welcome User Bot Services
            services.AddControllers().AddNewtonsoftJson();

            // Create the Bot Framework Adapter with error handling enabled.
            services.AddSingleton<IBotFrameworkHttpAdapter, AdapterWithErrorHandler>();

            // Create the storage we'll be using for User and Conversation state. (Memory is great for testing purposes.)
            services.AddSingleton<IStorage, MemoryStorage>();

            // Create the User state.
            services.AddSingleton<UserState>();

            // Create the bot as a transient. In this case the ASP Controller is expecting an IBot.
            services.AddTransient<IBot, WelcomeUserBot>();
        }
Step 8: Now, your welcome User Bot is ready just run the project and emulator

Click on the open Bot button & enter URL http://localhost:3978/api/messages then press on the connect button.

Once connected, the bot is ready to welcome you it will show you all the message which we have declared above step.

Now interact with Bot, just try to type Hi, Hello Bot will return you with the same reply just like echo bot.

Now try to say Help, Intro and see the magic bot will open prompt card.

Try to click on any card, bot will ask for confirmation to open URL.

Conclusion is, by using this framework we can create simple Introduces activity types and provides a welcome message on conversation update activity.
If you’re looking for experienced Azure Chatbot Developers or NET Developers, Contact us to discuss more.
RELATED READ
I work as a Sr. Software Developer at Samarpan Infotech with the latest technologies & taking responsibility for architectural systems research and development. A result driven professional, articulate & analytical senior software developer who build while(noSuccess){ tryAgain(); } solutions, having expertise in software & database architecture planning and designing.


